Setting up your email on your phone can vary slightly depending on the email provider and the type of phone you have. Here’s a general guide for setting up an email account on both iOS and Android devices:
For iOS (iPhone/iPad):
- Open Settings:
- Tap on the “Settings” app on your home screen.
- Mail, Contacts, Calendars:
- Scroll down and tap “Mail” (or “Mail, Contacts, Calendars” in older versions).
- Add Account:
- Tap on “Accounts” and then “Add Account.”
- Select Email Provider:
- Choose your email provider from the list (e.g., iCloud, Google, Yahoo, Outlook).
- If your provider isn’t listed, tap “Other” and then “Add Mail Account.”
- Enter Account Information:
- Enter your name, email address, password, and a description for the account.
- Tap “Next.”
- Server Settings (if needed):
- If you selected “Other,” you might need to enter incoming and outgoing mail server settings. These settings can usually be found on your email provider’s support page.
- Save and Sync:
- After entering the necessary information, tap “Next” and then “Save.”
- Your email should start syncing, and you’ll see your inbox.
For Android:
- Open Email App:
- Open the email app on your phone. This could be Gmail, Outlook, or another email client.
- Add Account:
- In the email app, go to settings. This is usually found in the app’s menu.
- Tap “Add Account.”
- Select Email Provider:
- Choose your email provider from the list (e.g., Google, Yahoo, Outlook).
- If your provider isn’t listed, select “Other.”
- Enter Account Information:
- Enter your email address and password.
- Tap “Next.”
- Server Settings (if needed):
- If prompted, enter the incoming and outgoing server settings. These can be found on your email provider’s support page.
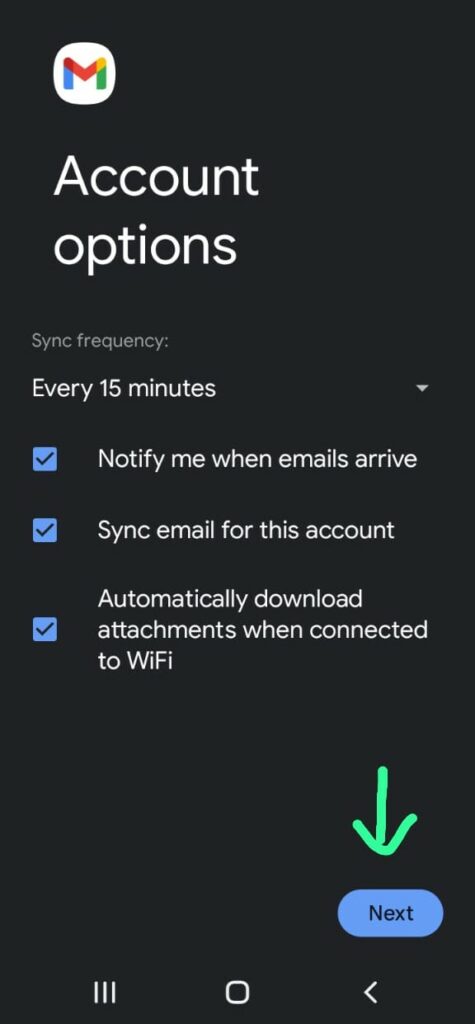
- Account Options:
- Choose how often you want your phone to check for new emails, and select your notification preferences.
- Tap “Next.”
- Complete Setup:
- Enter a name for the account (optional).
- Tap “Done” or “Next.”
- Your email should start syncing, and you’ll see your inbox.
If you encounter any specific issues or need help with a particular email provider, let me know!
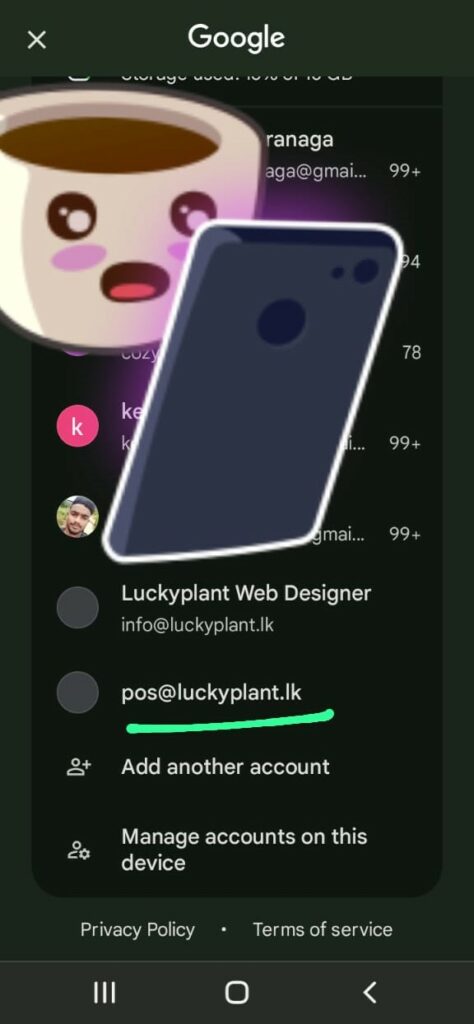
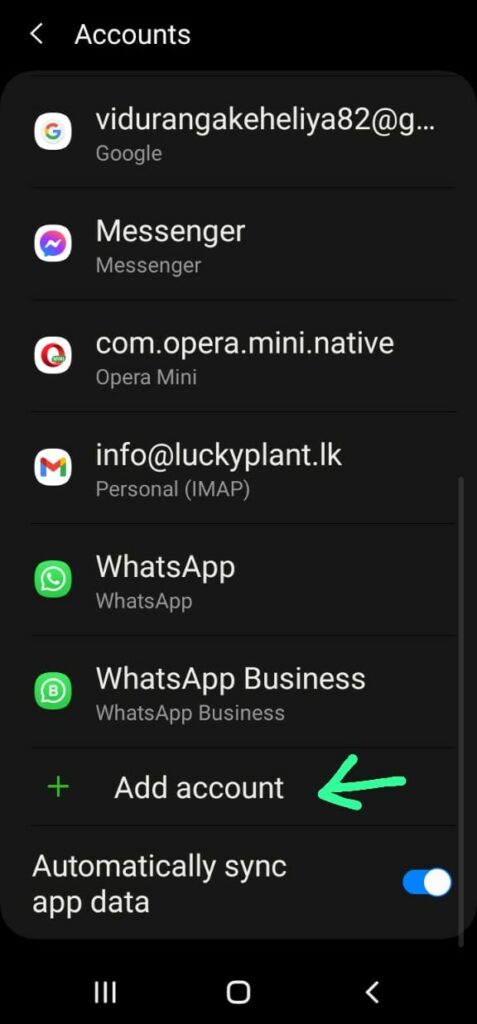
1ST You are going Setting on Your Phone
Click Account Tab

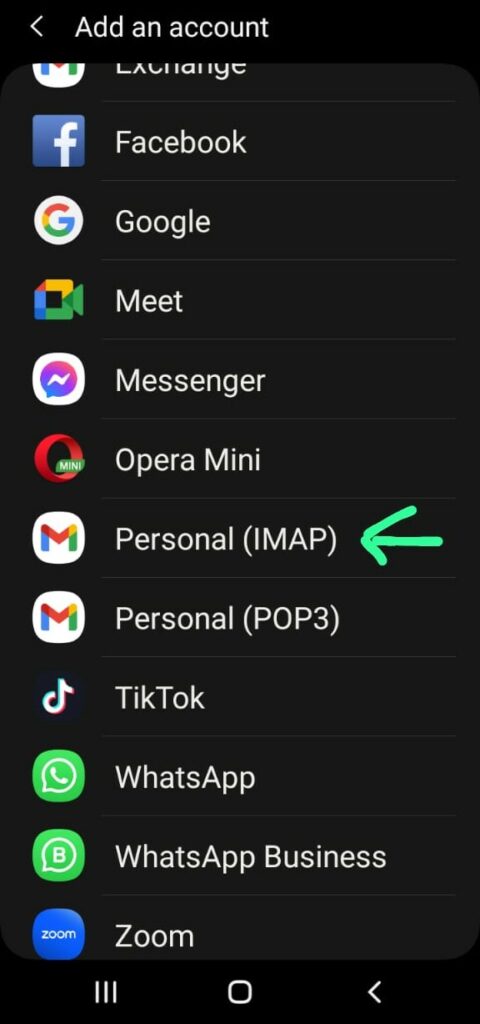
2 nd Click Add Account
3 rd Click Personal IMAP for your incomming outgoing emails
Next Add Your Email address
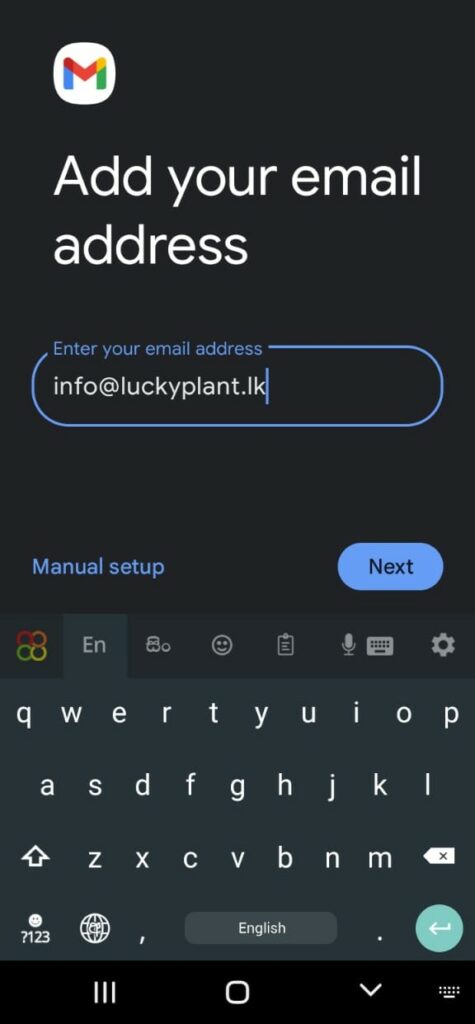
Incomming server setup. username same email and email password
and enter your smtp server
Eg: smtp.dreamhost.com , smtp.hostinger.com , smtp,tatitan.email

Next Setup Outgoing server
Enter same smtp server address
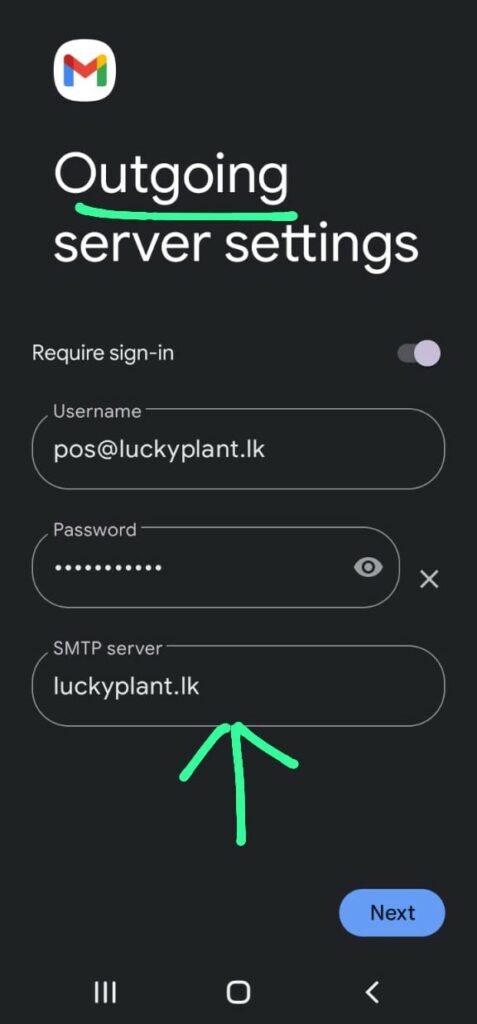
and Click Next Button
and Enter your name or company name
Check Your gmal app email list . you are found this email